Light Malt Extract Agar (LMEA) Recipe
What is LMEA?
Light Malt Extract Agar, popularly known as LMEA, is a key ingredient in mushroom cultivation. It's a blend of agar-agar, light malt extract, and water that creates a nutrient-rich medium for mushroom mycelium and spores to thrive. The distinguishing feature of LMEA is that it enables mycelium to grow on the surface, simplifying the observation and isolation process.
How is LMEA used for mushroom cultivation?
LMEA provides an ideal environment for spore germination and mycelium growth. By cultivating mycelium on agar plates, growers can selectively propagate robust, healthy mycelium and detect potential contamination before transitioning to larger substrates.
What grows on LMEA?
While LMEA supports the growth of various mushroom types, it can also harbor molds and bacteria, emphasizing the need for careful monitoring and control of the cultivation environment.
Ingredients and Equipment for LMEA:
Ingredients:
- Agar-Agar: Agar on Amazon
- Light Malt Extract: LME on Amazon
- Boiled Water
Equipment:
- Glass Container (Erlenmeyer Flask): Erlenmeyer Flask on Amazon
- Pressure Cooker: Pressure Cooker on Amazon
- Digital Scale: Digital Scale on Amazon
- Magnetic Stir (optional): Magnetic Stir on Amazon
- Funnel
- Infrared Thermometer (optional): Infrared Thermometer on Amazon
- Glass Measuring Cup
Water | Agar | LME | Plates |
---|---|---|---|
250 ml | 5 g | 7.5 g | ~10 |
500 ml | 10 g | 15 g | ~20 |
750 ml | 15 g | 22.5 g | ~30 |
1000 ml | 20 g | 30 g | ~40 |
1250 ml | 25 g | 37.5 g | ~50 |
1500 ml | 30 g | 45 g | ~60 |
1750 ml | 35 g | 52.5 g | ~70 |
2000 ml | 40 g | 60 g | ~80 |
Step-by-Step Light Malt Extract Agar Preparation
In this step-by-step guide, you'll learn how to prepare 250ml of Light Malt Extract Agar (LMEA) for mushroom cultivation. The process takes about 10 minutes for preparation and 30 minutes for cooking, making it a quick and easy way to create a versatile growth medium.
How Long Will it Take?
- Preparation: 10 mins
- Cook time: 30 mins
-
Water
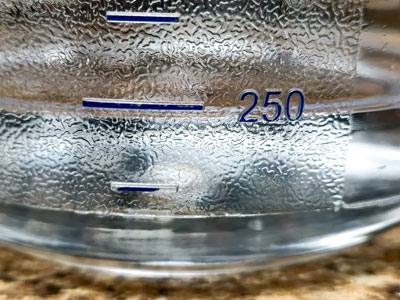
Measure the boiled water (250ml) and pour it into the glass container.
-
Dry Ingredients
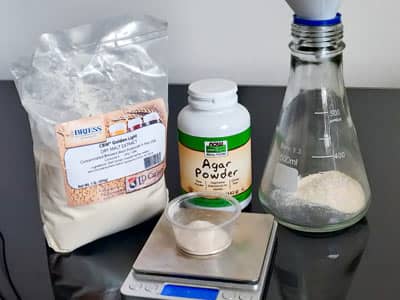
Use the digital scale to measure the dry ingredients and add them to the container.
-
Dissolve
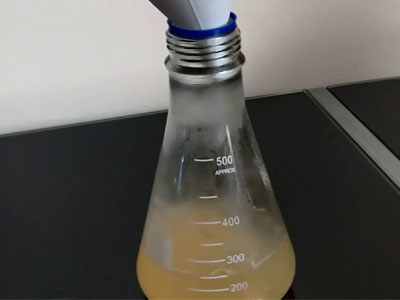
Stir until the dry ingredients are completely dissolved. The process can be facilitated by using a magnetic stir or taking advantage of the swirling motion in an Erlenmeyer flask.
-
Pressure Cooker
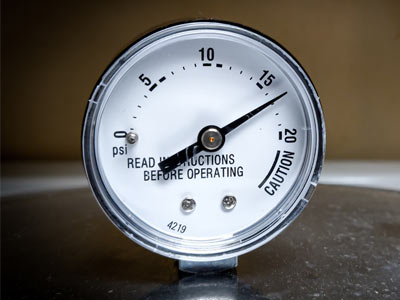
Pressure cook the mixture for 30 minutes at 15 PSI. Avoid overcooking, which can darken the mixture due to Maillard reactions between sugars and amino acids.
Pressure Cooker Tutorial -
Ready To Pour
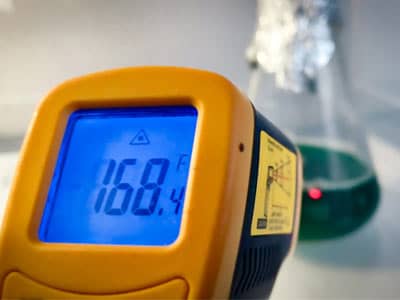
Allow the mixture to cool down to around 115-125°F (46-52°C) before pouring. If it cools too much, it will solidify. Use an infrared thermometer to ensure accurate temperature readings.
What is Maillard reactions
The Maillard reaction is a chemical reaction between amino acids and reducing sugars that gives browned food its distinctive flavor. It's a form of non-enzymatic browning which typically proceeds rapidly from around 140 to 165 °C (280 to 330 °F). Named after French chemist Louis-Camille Maillard, who first described it in the early 20th century, this reaction is a basic principle in food preparation, contributing to flavors, aromas, and colors of a variety of foods, from seared steaks and roasted coffee to bread and beer.
At a molecular level, the Maillard reaction can be quite complex, as it can produce different results depending on the type of amino acids, sugars, and reaction conditions. During the reaction, the carbonyl group of the sugar reacts with the nucleophilic amino group of the amino acid, and forms a complex mixture of poorly characterized molecules responsible for a range of odors and flavors. This process is accelerated in an alkaline environment (higher pH), or by increasing the temperature.
In the context of Light Malt Extract Agar (LMEA), when you pressure cook the agar mixture too long or at too high a temperature, the sugars in the malt extract can undergo Maillard reactions with the amino acids, darkening the mixture. The extent to which this may affect the growth of the mycelium on the agar depends on the specific type of mushroom and the severity of the browning, but it is generally avoided to maintain the desired characteristics of the medium.
Tips for Success with LMEA
How to Pour Agar
Whether you're using traditional petri dishes or k-cups, the pouring process should always take place in a sterile environment, such as a Still Air Box or under a laminar flow hood, to minimize the risk of contamination. After sterilizing your containers, slowly pour the agar mixture until it covers about 2/3 of the container's surface. Allow the agar to cool and solidify before moving on to the next step of inoculation or storage.
Preventing Condensation
After the agar has solidified, store your plates inverted (agar side up) in a cool, dark location. This practice minimizes condensation on the agar surface which could compromise the health of your cultures. To further control humidity, consider adding a desiccant such as silica gel packs to your storage area.
Storing Agar
Unused agar plates and mixtures can be stored in the refrigerator for later use. Always seal the containers well to prevent moisture loss or contamination. However, do not freeze the agar as this can alter its consistency and negatively impact its performance.
Storing Light Malt Extract
Light Malt Extract (LME) can be sticky and clump if not kept dry. To maintain its quality, store the LME in a dry place, preferably in an airtight container with desiccant silica gel packs.
Culture Slants
Culture slants are a great method for longer-term storage of your favorite strains. To create a slant, add a small amount of agar mixture to a test tube and tilt it until the agar coats the sides. Once cooled and solidified, the tube can be inoculated with the desired strain. The culture can be stored for a long time, provided it's kept in a cool, dark place.
Food Coloring
Add a touch of creativity to your experiments by incorporating food coloring into your agar mix. This doesn't just make your agar plates look more visually appealing, but it can also be a practical way to differentiate between various experiments or strains. However, remember to use food coloring sparingly to avoid inhibiting mycelium growth.
Check Air Quality
Use your agar plates as a tool for checking air quality. By exposing a plate to the air in your grow area for a short period, you can monitor for any colonies that form, indicating potential airborne contaminants. Regularly testing your workspace in this way is a key part of maintaining a sterile environment for successful mushroom cultivation.